Step One: Click on the Play Icon below to watch video 1 of 2.
Step Two: Click on the play icon below to watch video 2 of 2.
Entering an enrollment packet using the online registration tool.
Link to access OLR:
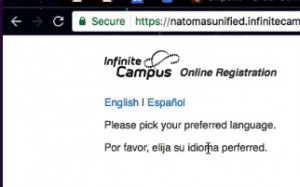
https://natomasunified.infinitecamps.org/campus/OLRLoginKiosk/natomas
Once you click on the link, the Online Registration tool will open up.
Click on English

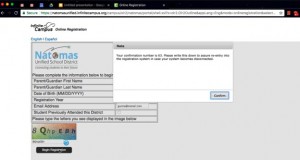
The following screen will appear and you will click, Start New Registration.
This box will not populate Infinite Campus data, simply allowing access to the Online Registration tool.
You will need to enter all of the fields for the guardian. If the guardian did not provide a birth date, use the default birth date of 10/01/1901.See amended KB version of Online Registration Tool – Entering a student registration packet. Also, you will be updating the School Preference on the studen page, at a different spot than originally reviewed. We are utilizing the new method to track who has entered which packet.

The Registration Year should default to enrolling year.
IGNORE: Students previously attended this district. This is for parents, with NUSD staff entering the packet in, it is not necessary to check off.
Once completed with this portion, fill in the Captcha box to distinguish human from machine input.
Click Begin Registration. You will be given a confirmation number. Please write this down to assure re-entry into the registration system in case your system becomes disconnected or interrupted.
Write the confirmation number on the top of the packet, along with your initials, and the date you processed the packet.
Click on confirm to move to the next step.
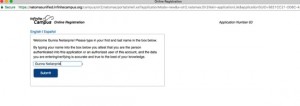
The confirmation and electronic signature will allow you to view the data you need to review, update, and or create. After you type in the electronic signature just as entered to begin Online Registration you will be sent to the welcome page.
The welcome page is primarily for parents/guardians and provides information helpful to them.

Once you click Begin, you will be able to start to input the information into the Online Registration tool.
Please default voice message for Emergency, Attendance, General, and Teacher.
DO NOT click any of the text options unless specifically noted on the application.
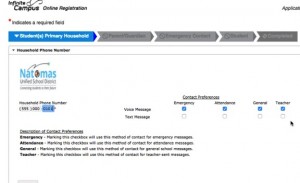
Click Next to move to the following screen. The home address field will populate if there is a match in Infinite Campus. Select in the drop down box, and the remainder of the fields will populate.

If there is not a match currently in Infinite Campus, than you can fill it in, review the address, and click next, once the address looks as you want it to. It will be saved later to IC.

TIP:
If you are searching and there is an apartment number, fill in the Number and Apartment field; the drop down box will pull if the address is already in IC.
After you have clicked next, the drop down accordion will ask for a mailing address.
If it is the same as the physical address, then simply click Save/Continue to move onto the next screen.

Mailing address:
Un-check the box and populate as you did previously. Once completed, select Save/Continue to move forward.
As you complete each section, the tab along the top will change from Green: Complete | Blue: In progress | Yellow: Requires Info. |Red: Missing Info.
The following screen will be the Parent/Guardian demographic information. Please populate all areas .
Please note that the red asterisk is required information. The Parent/Guardian name will be listed at the top.
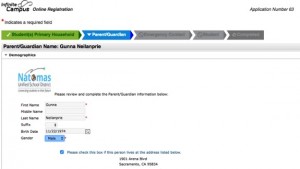
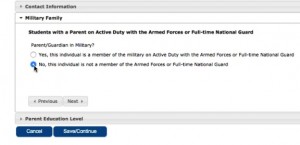
Once completed, select Save/Continue to move forward. Populate all of the information as listed on the packet. There is a state required question that is reviewed that is currently not on our paper enrollments, which is asking if the Parent/Guardian is active military or full time national guard.
Please default to NO unless noted somewhere on the application.(Ex. General J. Doe)
After you in put the parent educational level and click next, it will bring you to the following screen to add the second parent/guardian.

You will follow the same process for adding the second guardian as you did with the first. Notice the name for the second guardian will appear along the top below your status bar.
Once completed click Save/Continue which will take you to the next portion. Only parent and guardians should be added in this section. If there are multiple you may add them on this tab.
NOTE: The following tab will allow for emergency contacts to be entered who also live at the same residence.
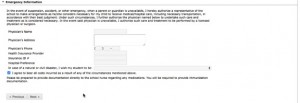
Once you’ve clicked on Save and Continue at the bottom of the Parent Guardian Screen it will move you to the Emergency Contact to screen.

The Emergency Contact Information Warning Screen will pops up notifying that an emergency contact other than a parent must be entered. The system requires a minimum of one emergency contact.
Exception: If the parent has not listed anyone else go ahead and list one parent for emergency contact.

Populate all of the fields where there is a red asterisk. Gender is required, if it is not listed please do your best based on the name or relationship provided to provide that information. When complete click Next to move forward.
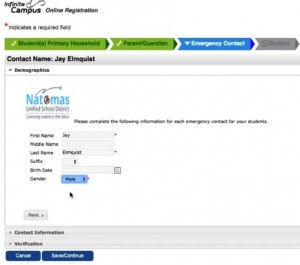
The Contact Information drop down will appear for cell phone, home, work, or email. Please populate with all the information provided. One phone number is required to move on. Once complete please click Next.

When you are finished please click Save and Continue ,this will bring you back to the Emergency Contact screen where you can add a new emergency contact.
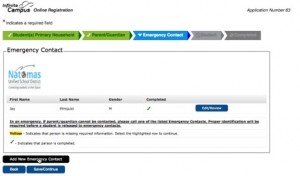
When you are finished entering emergency contacts ,hit Save and Continue.

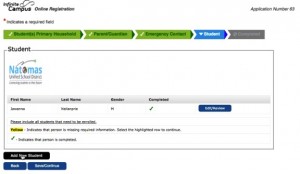
The next step is entering in the student information portion of the online registration tool. Notice at the top of the screen the Student tab is in blue indicating that you are at the student portion.
TIP: If this student has siblings that attend the NUSD district you can enter in multiple students with one packet.
Click Add New Student.

You will notice that the information looks very similar to the parent Guardian Information screen. When entering the student demographic information note that the birth countries if other than the United States, additional fields will pop up requesting date entered US, and date entered California school.

TIP: The states listed are all US States ,Mexico States ,and the provinces of Canada.
When you finish entering the required information on this page ,click the Next button.
As you go through each accordion drop down box, dependent on how the answers are selected, potential additional information will be required.
At the end of each section, click the Next button to move on to the next screen.

Moving through each box please fill in all the information that you have from the student enrollment packet. When done with each section, click Next to move through to the next step.

When you get to the Open Enrollment box ,the Online Registration tool will automatically populate the school based on the school assigned to the address selected.
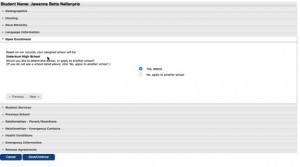
If the student has been approved to go to another school in Natomas Unified School District, there is an option to click “No apply to another school.”
Once you click the No button, a box will appear with a drop-down arrow allowing you to select the school intended for this student.
NOTE: Please note that not all the schools will be listed. The schools appropriate to the student’s grade will populate the drop-down option fields.

The next drop down is Relationships. Here is when the Parent/guardian information is attached to the student household.

Click Next to move on to the next step of this process.
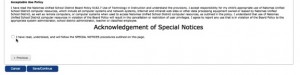
Under Special Notices, it will review all the special notices that the parent has reviewed in the student enrollment packet. If you see a signature acknowledging the receipt of all special notices please click the box indicating as such.
Once you’re done with this section click the Save and Continue button.
At this point if there is another student that is going to be attached to this household or a sibling, it will take you back to that main page for students where you can click add new student, or Save and Continue, if you are done adding all the information on the student enrollment packet. If there are no other siblings, or you simply completed all additional siblings click the Save and Continue button.
When you have completed all of the information, a box will appear with a red button that says Submit.
STOP: This is your one opportunity to select the back button and complete or change or update any information that you know needs to be corrected from the Student Enrollment packet.
Once you click the Submit button, you will not be able to go back in and edit any of the information.
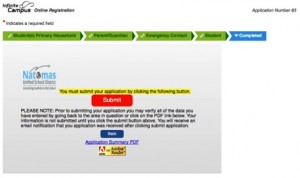
After clicking Submit, a box will ask you to confirm or cancel that you would like to submit this application when you are sure, please hit Confirm.

Once you have clicked the Confirm button, it will give you a screen that says “Thank you for completing your Online Registration. For a PDF copy of the submitted data you can click the link that says application summary PDF.”
NOTE: No paper copy is required.

After completion, select the ‘x’ or the red button which will close the screen bringing you back the first page of the online registration tool.
Now you can enter your next packet.